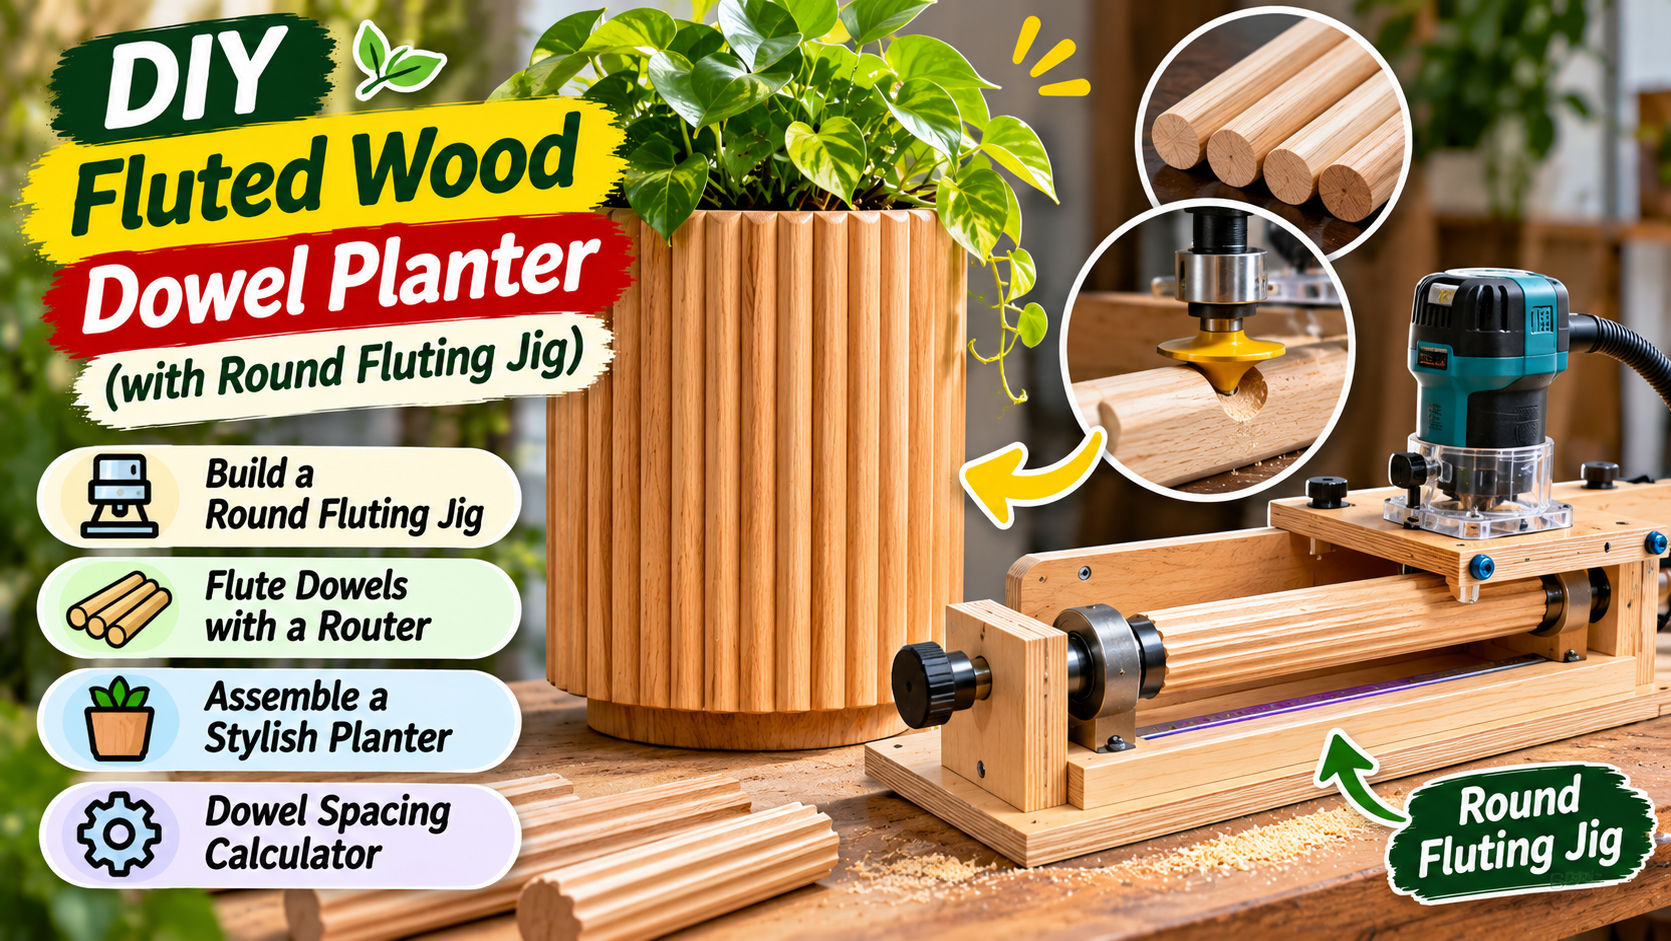
DIY Fluted Wood Dowel Planter: Build a Round Fluting Jig
DIY Fluted Wood Dowel Planter: Build a Round Fluting Jig
Make a modern ribbed planter from ordinary wood dowels, then build a simple indexing jig to cut consistent grooves around each dowel. This guide covers the jig, the planter sleeve, spacing, assembly and a moisture-safe finish.
A fluted wood planter brings the look of custom millwork to a small home project. Instead of buying an expensive ribbed pot, you can make a decorative sleeve from round hardwood dowels and a simple circular support. The round fluting jig in this tutorial helps you rout shallow, repeatable grooves along the length of each dowel so the finished surface catches light evenly.
What makes a fluted wood dowel planter?
A fluted planter has repeated grooves or rounded ribs running vertically around its outside. In this project, individual wooden dowels form the vertical pattern. Routing one or more shallow channels along each dowel creates extra highlights and shadows, while arranging the dowels around a round inner pot creates the overall cylindrical shape.
Plain dowel sleeve
Use smooth dowels glued side by side around a support. It is the simplest option and produces a clean, rounded-rib texture.
Routed fluted sleeve
Cut shallow longitudinal grooves into each dowel before assembly. This adds finer detail but requires careful jig setup and repeatable indexing.
For a first project, use a straight-sided nursery pot as a removable liner. The wood is a decorative outer sleeve, not the waterproof container that holds wet soil.
Materials and tools
For a small planter sleeve
- One straight-sided plastic nursery pot, approximately 5 inches (12.7 cm) across.
- Round hardwood dowels, around 3/4 inch (19 mm) diameter; buy extra for test cuts.
- Two plywood rings or a top-and-bottom support system sized to the chosen pot and dowels.
- Thin plywood or a stable inner sleeve to keep the dowels aligned during assembly.
- Wood glue compatible with the backing material, plus clamps or a band clamp.
- Sandpaper (120, 180 and 220 grit) and a suitable clear wood finish.
- Small rubber feet or cork pads to lift the planter sleeve off the surface.
For the round fluting jig
- 3/4-inch plywood base, approximately 30 × 8 inches (76 × 20 cm), adjusted to your dowel length and router footprint.
- Two straight guide rails and a sliding router carriage that bridges them.
- Two or three V-block supports to cradle the round dowel without rocking.
- Padded clamps or hold-downs to secure the workpiece.
- A 1/4-inch (6 mm) core-box/router bit suitable for your router and collet.
- A plywood indexing disc, a locking pin and a means of fixing the disc to a sacrificial end of the dowel.
- Stop blocks to define the start and end of every flute.
Tools: drill/driver, jigsaw or bandsaw, clamps, square, tape measure, marking gauge, router, suitable eye and hearing protection, and dust extraction.
How to build a round fluting jig
The jig uses a fixed cradle to stop the dowel rolling, a sliding router carriage to keep the cut straight, and an indexing disc to repeat the same angular spacing around the dowel. Jig dimensions depend on the router base and stock length, so make a cardboard or scrap-plywood mock-up before drilling or cutting the final parts.
Build the base and rails
Cut a flat plywood base long enough for the dowel plus the router carriage travel. Fasten two straight, parallel rails on either side of the work area. Space them so the router carriage sits securely on both rails without rocking or contacting the cutter.
Add the V-block cradle
Make two or three V-blocks from hardwood offcuts and secure them along the centreline of the base. Their job is to stop the dowel rolling while leaving its upper surface exposed. Add padded hold-downs that keep the dowel firmly seated without crushing it.
Make the router carriage
Use a flat plywood plate large enough to bridge both rails. Attach low-friction guide strips underneath so the carriage travels straight. Mount the router to the plate using its baseplate hole pattern, and cut a central opening for the bit. Check that the router is supported throughout the full travel and cannot tip.
Add an indexing disc
Fix a small plywood disc to a sacrificial extension at one end of the dowel. Mark and drill equal index positions around the disc: four positions for 90-degree spacing, six for 60-degree spacing, or eight for 45-degree spacing. Add a fixed pin or bolt to lock each position before routing. The disc must be securely attached and must not interfere with the router or clamps.
Install stops and check the travel
Clamp start and stop blocks so every flute begins and ends at the same point. With the router unplugged, slide the carriage through its full path and check bit clearance, support and clamp interference. Make a dry run before switching the router on.
How to cut consistent flutes into round dowels
For a decorative planter dowel, use a small core-box bit to make shallow rounded channels. A 1/4-inch bit is a practical starting point for a 3/4-inch dowel, but bit size and cutting depth must suit the stock and router. Begin with a very shallow test cut—around 1/16 inch—and deepen only if the test piece remains strong and the router runs smoothly.
Prepare oversize dowels
Cut each dowel a little longer than the finished planter height. Extra length gives you room for sacrificial ends, stops and safe clamping. Check that the dowel is straight and free of cracks or knots where the grooves will run.
Set the bit and test depth
Install the core-box bit with the router disconnected. Set the cut shallow, confirm the collet and bit shank are compatible, and make a test pass on a scrap dowel of the same diameter. Adjust the carriage and fence until the groove is centred.
Route the first flute
Lock the dowel in the V-blocks and engage the index pin. Start the router according to its manual, let it reach operating speed, then move the carriage in a controlled, steady feed. Do not force the bit. Make several light passes rather than one deep cut.
Index and repeat
Switch off and wait for the bit to stop completely. Disconnect power before releasing the clamps or moving the index disc. Rotate the dowel to the next detent, lock it again, and repeat the cut. Continue until all marked positions are fluted.
Sand and inspect
Remove sharp edges with 180- to 220-grit sandpaper. Check that the grooves are consistent and that the dowels have not split or become too thin. Trim to final length only after the routing is complete.
| Flute count | Index spacing | Visual result |
|---|---|---|
| 4 flutes | 90° | Subtle, widely spaced grooves |
| 6 flutes | 60° | Balanced decorative texture |
| 8 flutes | 45° | Fine, more detailed ribbing |
Assemble the round fluted wood planter
The easiest way to keep the planter practical is to make a wooden sleeve that fits around a separate plastic nursery pot. That way, water drains through the inner pot and the wooden dowels are not constantly exposed to wet compost.
Measure the inner pot
Measure the widest outside diameter and the height of the nursery pot. Leave enough clearance for the pot to lift out easily. Your decorative sleeve should not trap the nursery pot tightly or block its drainage holes.
Make two circular support rings
Cut a top and bottom ring from plywood or hardwood. The inside opening should clear the nursery pot, while the outside edge provides a consistent landing for the dowels. Sand the rings and dry-fit them around the pot before gluing.
Arrange the fluted dowels
Place the dowels vertically around the outside of the rings. Start by spacing them evenly, then adjust the count so neighbouring dowels meet neatly without forcing them out of line. Keep the flutes facing outward and alternate the orientation only if you want a more varied texture.
Glue and clamp the sleeve
Apply a thin, even bead of suitable wood glue where each dowel contacts the support rings or backing. Use a band clamp or several light clamps to hold the assembly while the adhesive cures. Follow the glue maker’s cure time and remove squeeze-out before it hardens.
Fit the liner and feet
Slide in the nursery pot and check that it can be removed without catching. Add small feet or cork pads under the wooden sleeve so moisture is less likely to collect beneath it. Always empty any standing water from the liner or saucer.
Dowel spacing calculator
Use this simple estimator to get a starting dowel count for a round sleeve. It assumes the dowels sit side by side around a circular core, with their centres one dowel radius outside the core surface. Real projects need a dry layout because dowel diameter, sanding and small gaps affect the final count.
Estimate: round [π × (core diameter + dowel diameter) ÷ dowel diameter]. This is a layout aid, not a precision machining dimension.
Finish and protect the wood
Sand the finished sleeve through 180 and 220 grit, remove dust, and apply a finish suitable for indoor furniture. Keep the finish on the exterior wood rather than inside the plant’s soil or drainage area. If the planter will sit in a humid room, use a coating rated for the expected conditions and allow it to cure fully before placing the nursery pot inside.
- Natural look: a clear water-based polyurethane or furniture topcoat can preserve the pale wood tone.
- Warm look: a compatible wood stain followed by a clear protective topcoat adds colour and protection.
- Painted look: prime and paint the outside, then use a compatible clear coat if the product system recommends it.
Common mistakes to avoid
| Mistake | Why it happens | Better approach |
|---|---|---|
| Uneven flute spacing | The dowel shifts or is rotated by eye. | Use a positive index disc and lock pin for every pass. |
| Deep, torn-out grooves | Too much material is removed in one pass or the bit is dull. | Use a sharp bit and several shallow passes on a test dowel. |
| Wandering cuts | The router carriage rocks or the rails are not parallel. | Square the rails, add guide runners and test full travel with power disconnected. |
| Split dowels | Grooves are too deep or the stock has weak grain. | Choose clear straight-grained dowels and keep the flutes shallow. |
| Water-damaged sleeve | The wood is used as a wet plant pot. | Use a removable waterproof nursery pot and keep the wood dry. |
Can you make the planter without a router?
Yes. For a simpler project, buy smooth round dowels or split/half-round moulding and glue them vertically around a cylindrical support. The dowels themselves create the ribbed profile, so you do not need to machine flutes. This is a good option if you do not have a router, a secure jig, or experience with small-stock routing.
You can also make the outer sleeve from plain craft dowels attached to a repurposed straight-sided container. Test the adhesive on a scrap first and keep the inner plant pot removable. A simple dowel-covered container approach is shown in this fluted wood planter project reference.
Frequently asked questions
What router bit should I use to flute round dowels?
A small core-box bit makes a rounded channel that reads as a flute. A 1/4-inch bit is a possible starting point for a 3/4-inch dowel, but select the bit and depth for your actual stock, router and manufacturer limits. Test on scrap first.
How many flutes should a round dowel have?
Four, six or eight evenly spaced flutes are all workable decorative patterns. Four gives a subtle look, six is balanced, and eight produces a finer texture. The best choice depends on dowel diameter and the depth of the grooves.
Can I flute dowels with a drill press?
A drill press is not a substitute for a properly guided router setup for long continuous flutes. Do not improvise a rotating cutter arrangement. Use a purpose-built jig and tool designed for the operation, or choose plain/half-round dowels for a no-router version.
Can I glue dowels directly onto a plastic pot?
Some adhesives bond to specific plastics, but ordinary wood glue generally is not designed for every plastic surface. A separate wooden backing sleeve or support rings make the assembly more predictable. Always check adhesive compatibility and test first.
How do I keep a wood dowel planter waterproof?
Use the wood as a decorative outer sleeve and place a separate plastic nursery pot inside. Keep drainage water away from the dowels, elevate the sleeve slightly and let any finish cure fully.
What wood is best for a fluted planter?
Poplar, pine, beech, oak and maple can work for an indoor decorative sleeve. Choose straight, dry dowels with minimal knots. Softer woods are easier to cut but may dent more readily; harder woods can give a crisp finish but need sharp tooling.
Can I make a fluted planter from plain craft dowels?
Yes. Plain dowels glued vertically around a cylindrical support create a ribbed or fluted appearance without routing grooves into each dowel. This is the simplest beginner-friendly method.
Final thoughts
A DIY fluted wood dowel planter is a manageable way to add custom texture to a room, and a round fluting jig helps make the details repeatable. Start with a test dowel, keep the cuts shallow, lock the work securely and use a removable nursery pot so the wood stays dry. If the router jig feels beyond your current experience, the plain-dowel sleeve produces an attractive result with much simpler tools.
Further woodworking references
- Rockler: Cutting flutes with an index wheel — explains index-wheel and wraparound layout methods for evenly spaced flutes.
- Woodworker’s Journal: Octagonal dowel-fluting jig — an alternative jig concept for creating repeated flutes in dowel stock.
- Woodcraft: Spindle fluting jig — describes router-platform support, stops and repeatable flute length.
- Woodsmith: Fluting jig — discusses a router jig and guide spacing for consistent cuts.
- Craft Your Happy Place: Fluted wood planter — an accessible dowel-covered planter sleeve inspiration.
This is an educational project outline, not a machine-specific jig plan. Verify router, bit, collet, guard and workholding requirements against the manuals for your equipment. Do not use the jig if you cannot secure the dowel and router carriage against movement.