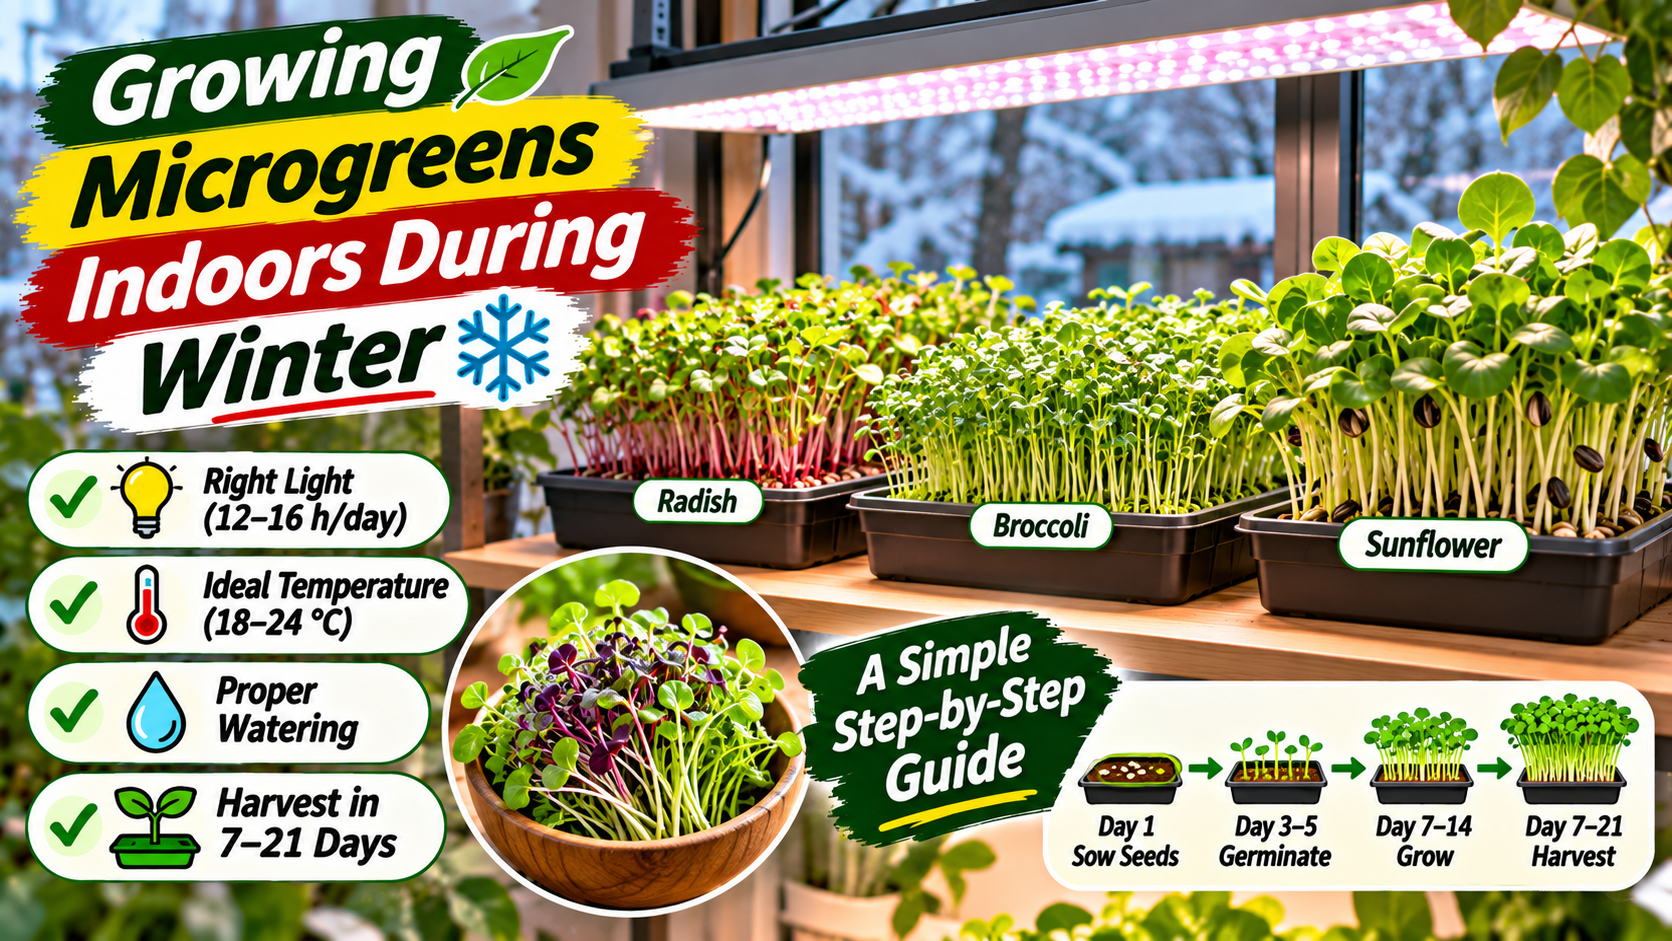
Growing Microgreens Indoors During Winter: Easy Guide
Indoor gardening • Winter growing
Growing Microgreens Indoors During Winter: A Simple Step-by-Step Guide
Grow fresh, crisp greens even when the garden outside is dormant. Learn which seeds to choose, how to set up trays and LED lights, how to water correctly, and how to prevent mold in a cool-season indoor garden.
When cold weather, short days, and frozen garden beds make outdoor gardening difficult, growing microgreens indoors during winter is an easy way to keep harvesting fresh greens. Microgreens need little space, grow in shallow trays, and are often ready to cut in around one to three weeks, depending on the crop and growing conditions.
Even better, you do not need a greenhouse or a large hydroponic system. A bright shelf, clean food-safe tray, suitable seeds, growing medium, water, and a modest LED grow light can be enough. With a few simple adjustments, you can grow radish, broccoli, pea shoots, mustard, and other microgreens throughout the colder months.
1. Why Grow Microgreens Indoors During Winter?
Microgreens are young vegetable, herb, and sometimes grain seedlings harvested while their first leaves are developed. Because they are harvested young, they take much less time and space than mature crops. The University of Maryland Extension describes typical microgreen harvests at roughly 2–3 inches tall and about 7–21 days after sowing, although each variety grows at its own pace.
Winter is actually a useful time to grow them indoors. You can place a tray on a kitchen counter, spare shelf, or small rack, and sow another tray every week or two. As a result, you can create a steady supply instead of harvesting everything at once.
2. Best Microgreens Seeds to Grow During Winter
For your first winter trays, choose quick-germinating varieties that are widely used for microgreens. Radish, broccoli, mustard, and many brassica mixes are useful beginner choices. Peas and sunflowers produce larger shoots, but their seeds are bigger and may need soaking before sowing.
| Seed | Typical harvest window* | Why try it? | Winter note |
|---|---|---|---|
| Radish | About 7–12 days | Quick, crisp, peppery shoots | Good first crop; watch for dense, damp growth. |
| Broccoli | About 8–14 days | Mild flavour and beginner-friendly | Works well on a shallow tray with steady light. |
| Mustard | About 7–12 days | Fast, spicy greens | Good for adding flavour to salads and sandwiches. |
| Pea shoots | About 10–21 days | Sweet, crunchy shoots | Soak large seeds if the supplier recommends it; give shoots room and airflow. |
| Sunflower | About 8–14 days | Nutty flavour and substantial shoots | Use food-growing seed; remove loose hulls and monitor moisture. |
| Arugula | About 8–14 days | Peppery leaves and compact growth | Can perform in somewhat lower light, but avoid a very dim shelf. |
*These are planning estimates, not guaranteed harvest dates. Seed variety, temperature, light, density, and growing medium all affect timing.
3. Equipment Needed for an Indoor Winter Microgreens Garden
You can start with a low-cost setup. The most important point is to make sure water can drain and that trays are clean before each new crop.
Trays and containers
Use a shallow, food-safe planting tray with drainage holes and a second solid tray underneath to catch water. A standard 10 × 20 inch (approximately 25 × 51 cm) microgreens tray is convenient, but clean reusable food containers can also work if they are suitable for food contact and have drainage holes added safely. Do not use containers that previously held chemicals or non-food substances.
Growing medium
Use a lightweight, clean soilless seed-starting mix or a microgreens mat made for edible crops. Coco coir, hemp, jute, or other purpose-made mats can also be used. A layer around 1–1.5 inches (2.5–4 cm) deep is a useful starting point for many tray-grown varieties. Avoid dense garden soil because it can compact in shallow indoor containers and make drainage harder to manage.
Other useful supplies
- Fresh microgreens seeds from a reputable supplier.
- Clean water suitable for drinking.
- A spray bottle for the initial sowing period.
- A full-spectrum LED grow light if natural light is insufficient.
- An outlet timer to keep the light schedule consistent.
- A small fan for gentle air movement, if the room feels stagnant.
- Clean scissors and a clean container for harvested greens.
4. Winter Light and Temperature Requirements
How much light do microgreens need?
Short winter days are one of the main reasons indoor seedlings become pale, thin, or stretched. A sunny window may be enough in some homes, but a grow light makes conditions more predictable. University of Maryland Extension recommends about 16 hours of total light daily for indoor microgreens, while other extension guidance commonly suggests a range of approximately 12–16 hours depending on the crop and fixture.
As a practical starting point, run a suitable LED grow light for 12–16 hours per day and provide a dark period overnight. Follow the fixture maker’s distance guidance because brightness varies significantly between lights. A common starting distance for some fixtures is 6–12 inches above the foliage, but check for leaf bleaching, heat, or stretching and adjust as needed.
What temperature is best?
Many microgreens germinate and grow well in moderate indoor temperatures. Around 18–24°C (65–75°F) is a practical general range for many common varieties, although the ideal temperature differs by crop. Some production guidance places the growing range closer to 16–21°C (60–70°F). Cooler conditions usually slow development, so allow extra days rather than trying to compensate with excessive watering or fertilizer.
Keep trays away from icy window glass, cold draughts, direct radiator heat, and kitchen appliances that cause sharp temperature swings. If the room is cool, move the tray to a more stable indoor shelf. A seedling heat mat can help with germination for certain crops, but use it according to its instructions and avoid overheating the growing medium.
5. How to Grow Microgreens Indoors During Winter: Step by Step
Once your supplies are ready, follow this simple process. Sow one variety per tray at first, since different seeds can have different germination and harvest times.
- Clean the trays.
Wash trays with detergent and water, rinse well, and allow them to dry. If using a sanitiser, choose one suitable for food-growing equipment and follow its label instructions and contact time. Clean trays between crops. - Moisten the growing medium.
Fill the perforated tray with about 1–1.5 inches of moistened soilless mix. It should feel evenly damp, not flooded or dripping. Level the surface gently without compressing it hard. - Sow the seeds evenly.
Spread seeds across the surface at the rate recommended by the seed supplier. Press them gently into contact with the medium. Avoid thick piles of seeds, which can restrict airflow and encourage uneven growth. - Mist and cover for germination.
Mist the surface, then use a clean cover to hold moisture during the initial germination period. Check the tray daily. Some larger seeds benefit from a short weighted blackout period, but do not leave a wet, sealed tray covered longer than needed. - Move seedlings into the light.
Once most seeds have germinated and seedlings begin to lift the cover, remove it and place the tray under the LED light or in a suitable bright window. Do not allow young shoots to become long and pale while waiting for light. - Water carefully.
Keep the medium moist but not saturated. Once seedlings are established, bottom-water by adding a shallow amount of water to the solid tray and allowing the growing tray to absorb it through its drainage holes. Pour away excess water afterward. - Harvest at the right stage.
When the cotyledons are open and the first true leaves are beginning to appear, or at the stage recommended for that variety, cut the shoots just above the growing medium with clean scissors.
6. Watering and Fertilizer: What Changes in Winter?
Indoor trays often dry more slowly in winter because evaporation and plant growth can be slower. However, heating systems can also make indoor air dry, so the correct approach is to check the tray rather than follow a rigid daily watering schedule.
Keep the medium moist, not waterlogged
During germination, mist gently when the surface begins to dry. After the seedlings are established, bottom watering can help keep foliage drier and reduce splashing. Do not leave the tray sitting in standing water. Excess moisture can reduce air in the root zone and increase the risk of mold or seed rot.
Do microgreens need fertilizer?
In most short-cycle microgreens grown in a suitable medium, additional fertilizer is not necessary. The seed contains enough stored nutrients for the early growth period, and the crop is harvested young. Start with a clean, suitable growing medium and follow reliable crop-specific instructions rather than automatically adding liquid fertilizer. If you are growing longer-cycle baby greens instead of microgreens, their nutrient needs may be different.
7. How to Prevent Mold When Growing Microgreens Indoors
Mold is one of the most frustrating problems in indoor winter growing. Trays are often kept moist, rooms may have limited air movement, and crowded seedlings can hold humidity around their stems. Fortunately, a few basic habits reduce the risk.
- Start with clean trays: wash and sanitise reusable containers appropriately between crops.
- Use fresh, reputable seed: do not sow old, damp, mouldy, or visibly damaged seed.
- Avoid over-sowing: follow the seed supplier’s recommended density and spread seed evenly.
- Do not keep the tray soaked: the medium should be moist but should not have standing water.
- Remove covers promptly: once germination is established, uncover the crop and move it into light.
- Improve gentle airflow: leave space between trays and use a small fan on a low setting if air is stagnant.
- Keep foliage relatively dry: bottom-water established seedlings where practical.
Also remember that fine white root hairs close to the roots can be normal. They are usually concentrated around the root surface, while mould may spread across seeds or the growing medium. When you cannot confidently distinguish normal root hairs from contamination, take the safer option and discard the questionable crop.
8. When to Harvest and How to Store Microgreens
Most microgreens are harvested when their seed leaves are open and the first true leaves are emerging, although the ideal stage depends on the variety. Many crops are ready in about 7–21 days from sowing. Pea shoots and some larger-seeded crops may take longer, especially in a cooler room or under weaker light.
Use clean, sharp scissors and cut just above the surface of the growing medium. Microgreens are generally a one-time harvest; the same tray should not be expected to regrow like cut-and-come-again lettuce.
Wash and refrigerate safely
Wash harvested greens with clean drinking-quality water before eating. Because microgreens are delicate and perishable, handle them gently, dry them well, and refrigerate promptly in a clean container. For best quality, use them soon after harvest. Storage life varies with crop, harvest condition, washing, and refrigerator temperature, so discard greens that become slimy, smell unpleasant, or show visible spoilage.
9. Common Winter Microgreens Problems and Fixes
| Problem | Likely cause | What to try |
|---|---|---|
| Long, pale stems | Insufficient light or light placed too far away | Improve light coverage, check fixture distance, and use a timer. |
| Slow germination | Cool medium, old seed, or uneven moisture | Check seed freshness, stabilise room temperature, and keep the medium evenly damp. |
| Seeds rotting before sprouting | Waterlogged medium or poor drainage | Drain excess water, reduce misting, and use a tray with drainage holes. |
| Fuzzy growth or musty smell | Excess moisture, overcrowding, poor airflow, or contaminated seed | Do not eat affected growth; discard the tray, clean equipment, and correct the growing conditions. |
| Dry, curled leaf edges | Growing medium drying out or intense heat/light | Check moisture more often and adjust the light or tray position. |
| Uneven growth | Uneven sowing, patchy moisture, or uneven light | Level the medium, distribute seed evenly, and reposition the light for uniform coverage. |
10. A Simple Winter Microgreens Schedule
Rather than planting a large quantity at once, use a small succession schedule. This spreads out harvests and helps you learn how each crop performs in your room.
Keep a simple notebook with seed variety, seed density, room temperature, light duration, watering, and harvest date. After a few cycles, you will know which varieties produce the best results in your particular winter setup.
Frequently Asked Questions
Can I grow microgreens indoors without a grow light?
Yes, if you have a sufficiently bright window. However, winter daylight can be short and inconsistent. If shoots become pale or stretched, add a suitable LED grow light and use a timer.
How many hours of light do microgreens need in winter?
A useful starting range is 12–16 hours of light per day, depending on the variety and fixture. Provide a dark period overnight and adjust the setup if seedlings stretch or show signs of light stress.
Do microgreens grow more slowly in a cold room?
Usually, yes. Cooler temperatures slow germination and growth for many varieties. Move trays away from cold draughts and aim for a stable, moderate indoor temperature rather than applying excessive heat.
Do microgreens need fertilizer?
Most short-cycle microgreens do not need extra fertilizer when grown in a suitable seed-starting medium. Their seeds contain stored nutrients to support early growth.
How do I stop mold on indoor microgreens?
Use clean trays and fresh seed, avoid over-sowing, keep the medium damp rather than saturated, remove covers after germination, and provide gentle airflow. Discard any tray with spreading mould or a rotten smell.
Can I use regular vegetable seeds for microgreens?
Use seeds from a reputable supplier that are specifically suitable for edible growing. Avoid chemically treated garden seed and follow the supplier’s instructions for soaking and sowing.
How long do microgreens take to grow indoors?
Many varieties are ready in about 7–21 days, but timing depends on species, temperature, light, seed quality, and the harvest stage you prefer.
Can I reuse the growing medium after harvest?
For a simple home setup, using fresh clean medium for each sowing is a straightforward choice. If you choose to reuse or refresh medium, remove old roots and follow sound sanitation practices; do not reuse medium from a tray that had mould or disease.
Final Thoughts: Enjoy Fresh Microgreens All Winter
Growing microgreens indoors during winter does not require a large garden or expensive equipment. Start with one or two trays, choose quick-growing varieties, and give seedlings the right balance of light, moisture, temperature, and airflow.
Most importantly, keep your growing equipment clean and treat food safety as part of the growing routine. Once you understand how your favourite seeds behave in your home, you can sow small batches regularly and enjoy fresh greens even when outdoor gardening is on pause.
- University of Maryland Extension – Growing Microgreens and Baby Greens Indoors
- Penn State Extension – A Step-By-Step Guide for Growing Microgreens at Home
- UC Agriculture and Natural Resources – Your Indoor Winter Garden: Fresh Microgreens for Gloomy Days
- UConn Extension – The Amazing Power of Microgreens: Easy to Grow and a Superfood
- Virginia Tech Extension – Introduction to Microgreen Production in Indoor Vertical Farms and Greenhouses